Showing posts with label t-shirt. Show all posts

Tuesday, August 21, 2012

T-Shirt Totes


This is how you do it!


Save the scrap pieces for later in the project.


I made a template from freezer paper for the girls to follow.


If you decided to stitch the shoulder straps together instead of tying them,
you can finish with the last two steps.


All done!

Click here to return to Girl's Camp Crafts!

Tuesday, May 24, 2011

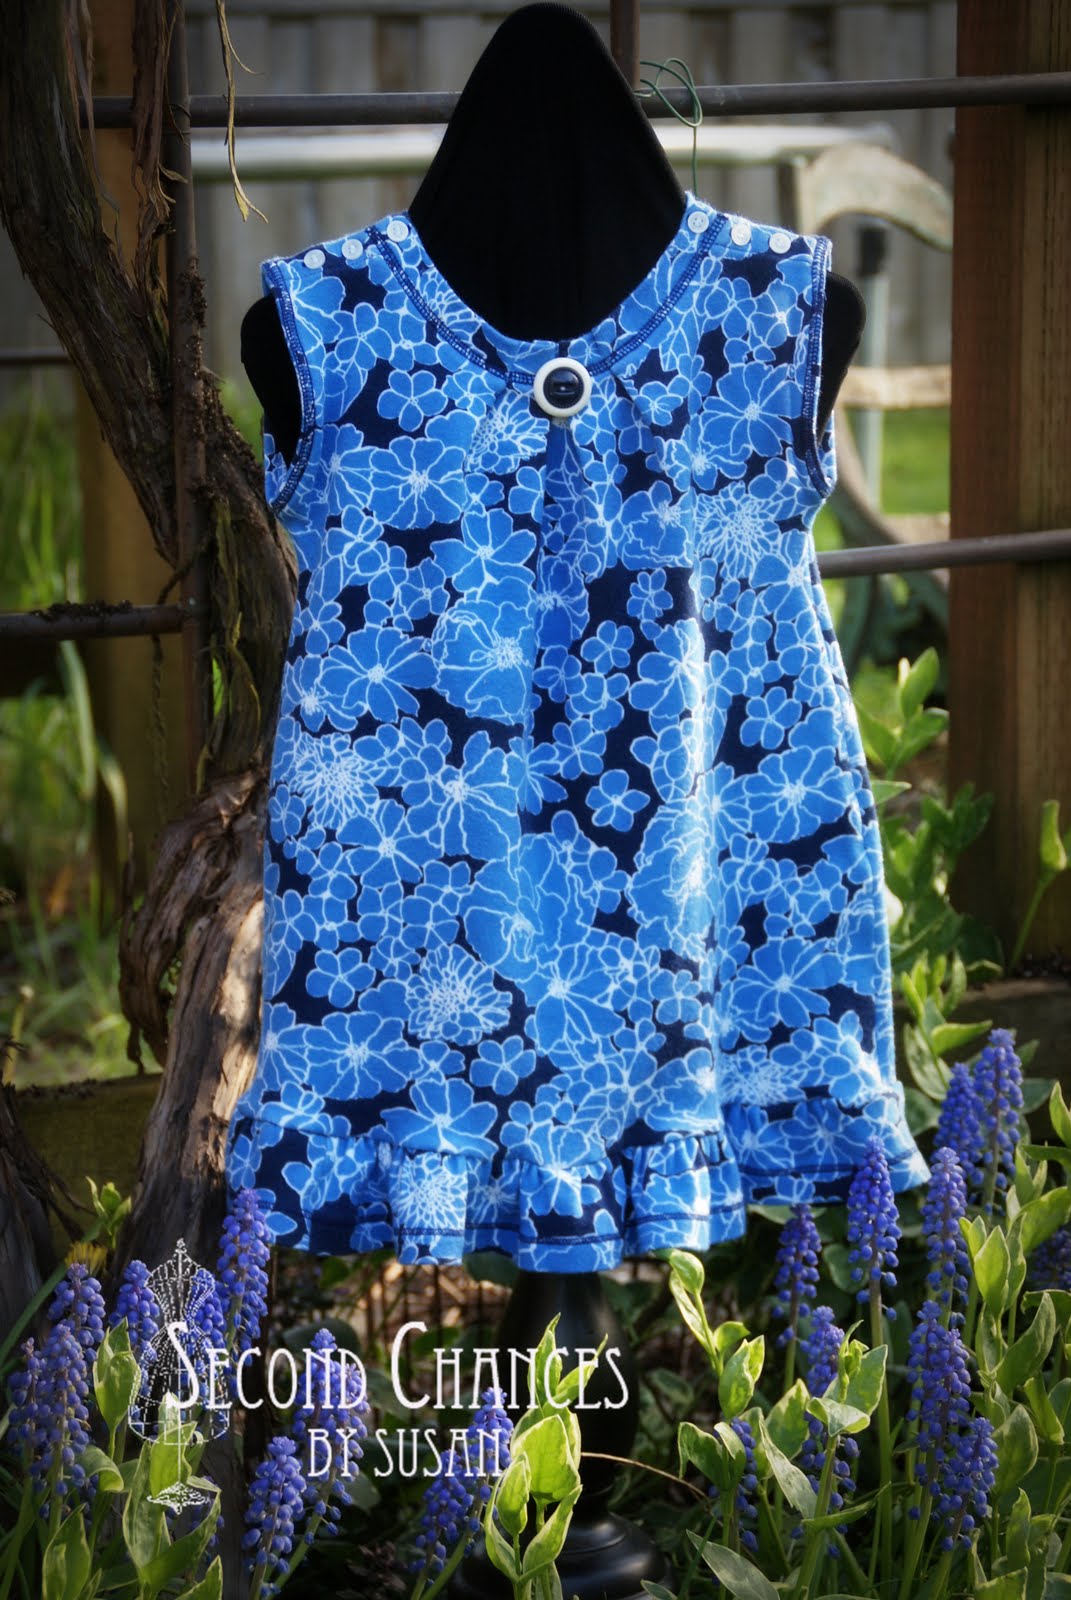
Blue T-Shirt Dress

This blue dress was so simple on account of the working button detail on the shoulder.  This allowed me to make the neckline smaller with pleats and still be able to get the dress on and off by just unbuttoning one shoulder seam.

Supplies Needed:

Woman's t-shirt
scissors
tape measure
pins, needle and thread
sewing machine
child's dress, t-shirt, or pattern to be used as a guide
decorative button (optional)

Begin with a t-shirt that has buttons already at the shoulder.  If you don't have a t-shirt with this detail, you can still make the dress, but you will need to follow the back neckline detail of the pink dress in order to get the dress on and off.


Before I began, I decided I liked the overcast stitch detail on the t-shirt and I wanted to incorporate it into the design.  I cut off about 3" from the bottom of the t-shirt and the sleeves to be used later for a ruffle.


Cut away the sleeves, allowing enough excess fabric to be able to turn it under and topstitch.  I did this so that I could take advantage of the overcast stitch detail.


Figure how big you want the armhole openings to be (you might look at an existing t-shirt, dress, or child's pattern to get an idea.)  Cut the sides of the t-shirt starting at the armholes and continuing to the bottom edge of the t-shirt so that your overall width is the size you want.  Be sure to allow for a seam allowance.  I also needed to cut a bit off the length and did so at this point.


It's time to start construction.  I placed a pin at the center of the front neckline.  Then I placed three more pins to each side of the center pin at 1" intervals.  Repeat on the back neckline.


Starting with the pin to the right of the center, fold the neckline at the pin and bring the fold to the center.  Pin in place.


   Make a fold at the furthest pin and bring it toward the center to the next nearest pin.  Pin in place.


Repeat on the left side.


You should now have four pleats pinned in place.  Repeat the same process on the back neckline.  Stitch in place.


Turn the dress right sides together and stitch the side seams.


Serge or finish the edges of the armhole openings.


Fold the excess fabric to the back of the armhole opening and topstitch in place.


Stitch the ruffle pieces together (the pieces you cut from the bottom edge of the t-shirt and the bottom of the sleeves.)


Gather the ruffle, pin to the bottom edge of the dress and stitch in place.


And that's all there is to it!  Oh, except for a little button detail in the front, if you desire!


Click HERE to return to the original post of the dress.

Pink T-Shirt Dress

Although this little dress is made from a Women's t-shirt like the blue dress, it doesn't have the existing button detail at the shoulder.  So, it needed another way to provide ample room in the neckline for putting it on and taking it off.  Also, this dress has sleeves and contrasting fabric at the neck to bring the neckline up, along with an optional ruffle detail at the bottom edge.

Supplies Needed:

(2) Women's t-shirts
scissors
tape measure
sewing machine
child's dress, t-shirt, or pattern to be used as a guide
decorative buttons, optional
pins, needle and thread


Cut the sleeves away from the dress.


Using a child's dress, t-shirt, or pattern, determine how much to cut the sides and armhole openings.


Using the dress, t-shirt, or pattern, determine how big to cut the sleeves.  The picture below shows the sleeve folded in half.  The grid is a 1" grid to give you an idea of the size.


Begin with pleating the front neckline by placing a pin at the center.  Then place three pins to each side of the center pin spaced at 1" intervals.  Make a fold at the pin that is to the right of the center pin and bring the fold to the center.  Pin in place.  Make another fold at the furthest pin to the right and bring it to the next nearest pin toward the center.  Pin in place.  Repeat on the other side.  


 Stitch in place.


The back neckline is going to be bigger now and will need to have the excess cut away.  Determine how much excess there is by pinning in place.


Trim away the excess, allowing a 3/4" seam allowance.


With right sides together, stitch the back 3/4" seam to within about 3" from the top.


Press the seam open and top stitch the opening in place.


Attach a small button and ribbon or fabric loop to the top of the opening.


The next steps are basic and, sorry, I don't have pictures.  Attach the sleeves.  I hemmed them by doing a rolled hem on the serger.  I stretched it as I went along to give the edge a ruffled look.  Stitch the side seams and hem the bottom of the dress with a small rolled hem.  Create the rows of ruffles by cutting several 1 1/2" strips from the second t-shirt.  I cut 2 1/2  strips for each row.  


I stitched the 2 1/2 pieces together and did a rolled hem on each side with the serger.  Stitch a basting stitch down the center.  Repeat with the next 2 1/2 pieces.


Gather the ruffle and stitch the first row in place at the bottom of the dress.


Gather the second row and stitch it above the first.


The neckline will most likely be too low.  Cut an oval piece of fabric wide enough to insert at the neckline.  Fold it in half and stitch around the edge.


Hand stitch the insert in place and add button details if desired.


And there you have it!


Click HERE to return to the original post of the dress.