
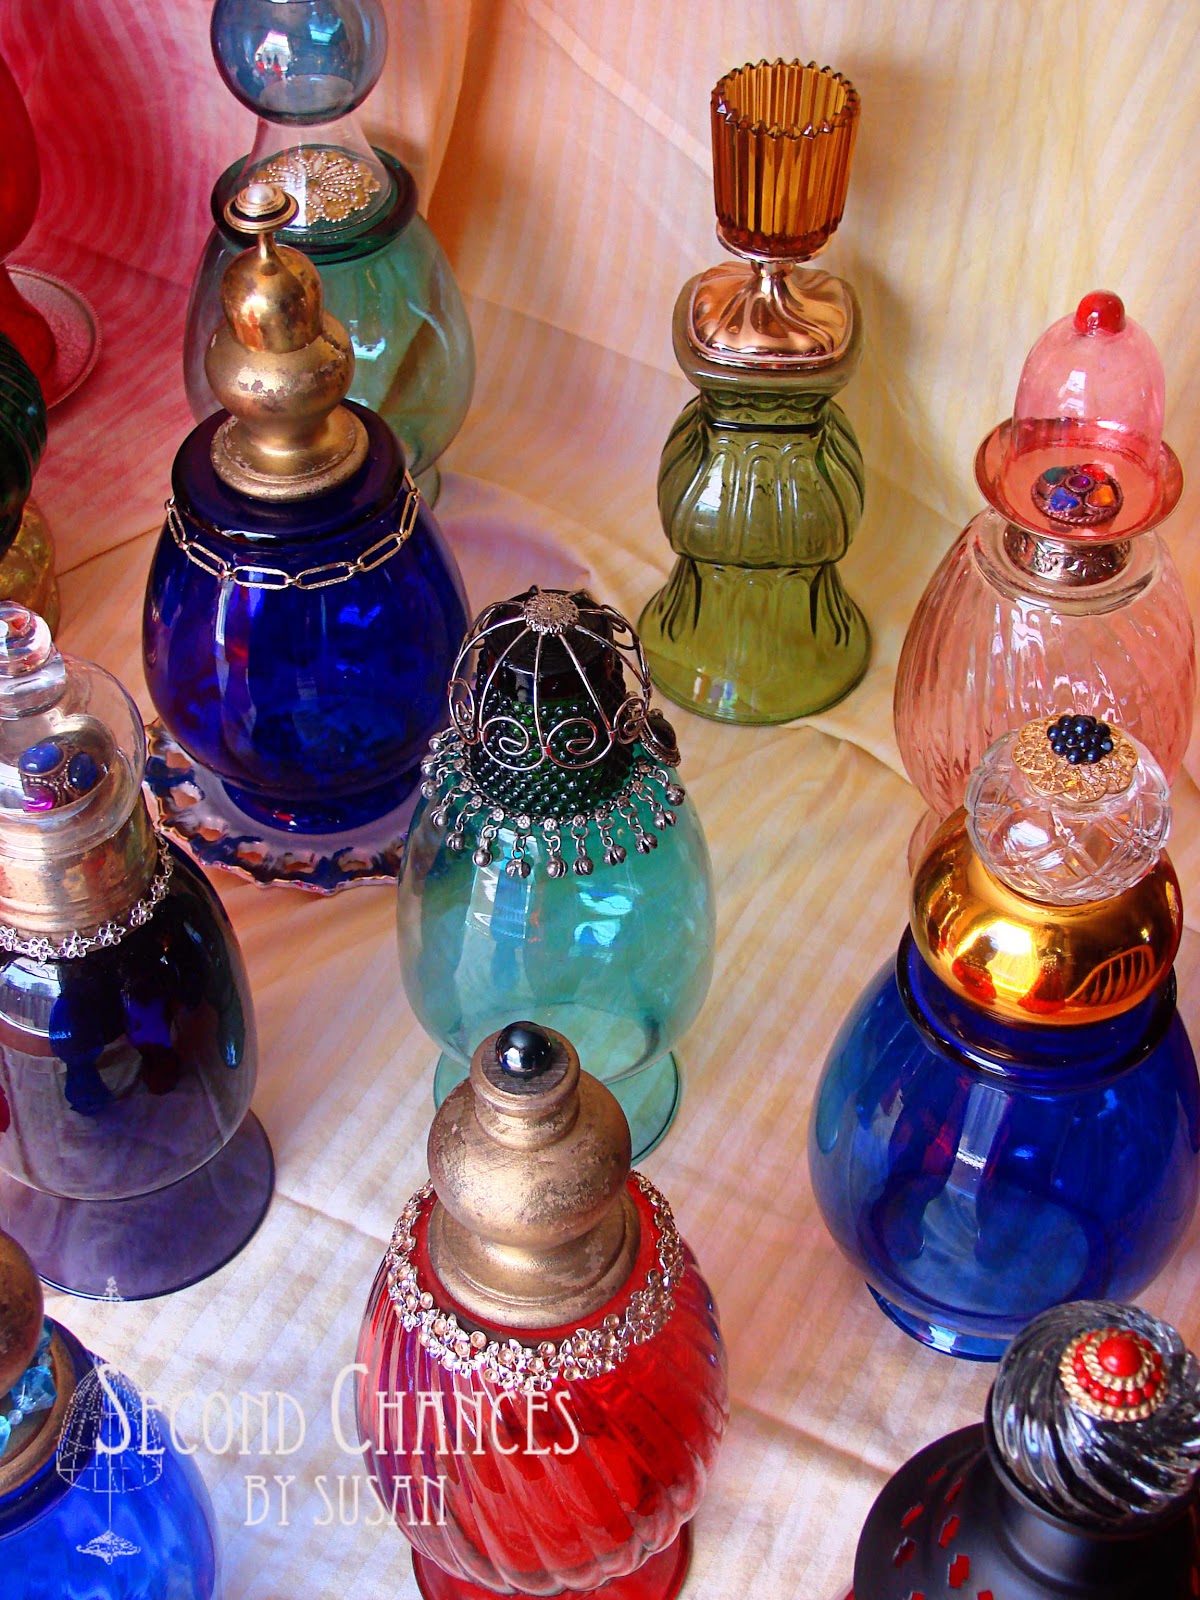
I had the fun of decorating for a Moroccan-themed party. You can view all the decorations by visiting this post. But for this tutorial, I'm going to show you some of the pieces I picked up, all from thrift stores, to make these wonderful lanterns. Most of the pieces, including the vases, were a dollar or less. I have quite a stash of costume jewelry to choose from...yeah! So, each lantern easily cost less than $5 to make, with most of them coming in around $3! All of the flower vases, and many of the other pieces were turned upside down to make the lanterns. All of the pieces were glued with E-6000 glue. Once finished, the lanterns sat on top of small battery-operated LED lights. Simple, but very effective!

For this one, the votive holder was kept upright, while the perfume bottle was turned upside down. The neck of the bottle rested in the votive opening. Earrings were glued to the top of the perfume bottle.

The brass goblet was turned upside down and fit over the top of the wooden finial. The earring and chain were glued in place. The base of the lantern rests unglued in the planter opening, accommodating for the LED light.

The small vase and silver cap are turned upside down and glued. The earring and chain were glued in place. The lantern sits unglued on top of the candle plate.

The green votive holder was turned upside down and glued in place. Is was adorned with a decorative metal piece and silver bracelet.

The small vase and metal votive holder are turned upside down. An earring was added to the top. The lantern sits unglued on top of a planter that has also been turned upside down.

The perfume bottle is glued to the opening of the gold votive holder, then both are glued to the vase.

The brass votive holder is turned upside down and an earring is glued in place. The clear votive holder is turned upside down and glued to the brass piece. The whole piece is then glued to the vase with the flower chain added as an accent.

The crystal votive holder is turned upside down and glued to the bottom of the metal votive holder. An earring is glued at the top. The whole piece is then glued to the vase. The lantern sits unglued on top of the candle plate and trivet frame.

An earring is glued to the top of the brass candlestick, which is then glued to the bottom of the metal votive holder. The whole piece is glued to the vase. Dangle earrings are glued to each side of the lantern. The lantern sits unglued on top of a mosaic tile candle plate.


The decorative metal piece ("your guess is as good as mine") is probably one of those inexpensive hair bun "cages" that you can find at just about any swap meet or accessory store. :) Love your creative ideas!
ReplyDeleteThanks! I would have never guessed that!
Deleteyes, that's exactly what it is. I have a few of them. They actually come with the "stick" that goes through the bun holder part so it stays on your hair. I have that exact one that's in your photo. LOL!!
DeleteYou are so clever Susan! It's always impressive when you and your mother decorate for a party...nice job!!
ReplyDeleteThanks Michelle! For years, I watched mom and dad decorate for many ward activities, so I guess its in my genes!
Delete